Macaron Madness

Sorry that it’s been a while since I’ve posted!

But, do not worry, this post will sure make up for the time I’ve been absent!

Recently, I had a few friends over to make the infamous MACARON.

Previously, I tried making macarons, but they weren’t too successful because there were no feet (the ruffle on the edges of the macaron). As well, the macaron shell were deflated due to an extremely runny batter– it was oozing out of the piping bag!

IMG_4267

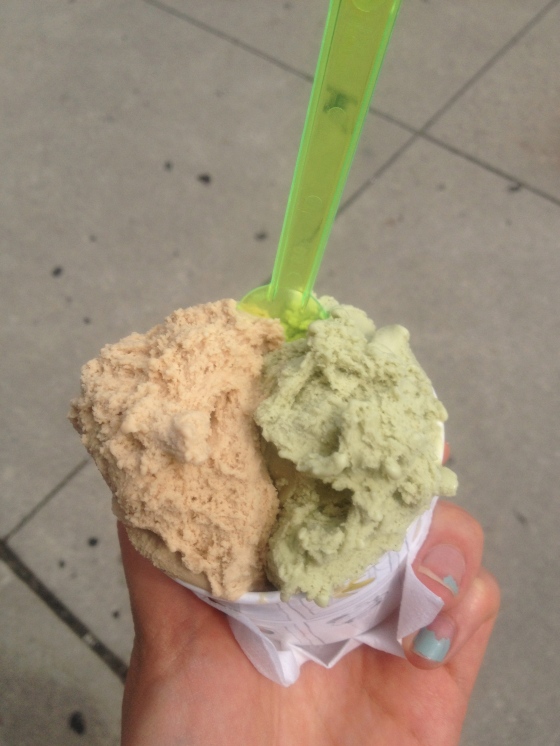
Attempted Matcha Macaron

IMG_4270

The second time I made the macarons, I was a bit more successful. Small feet appeared on some, but many did not rise enough.

macaron

Nevertheless, the third time’s the charm right?! This time, ALL the macarons had feet, and rose pretty well with minimal cracks. I was extremely happy with the result because I sure put tons of time and effort into making these french delicacies. I guess this goes to show that practice makes perfect.

Image

IMG_5121

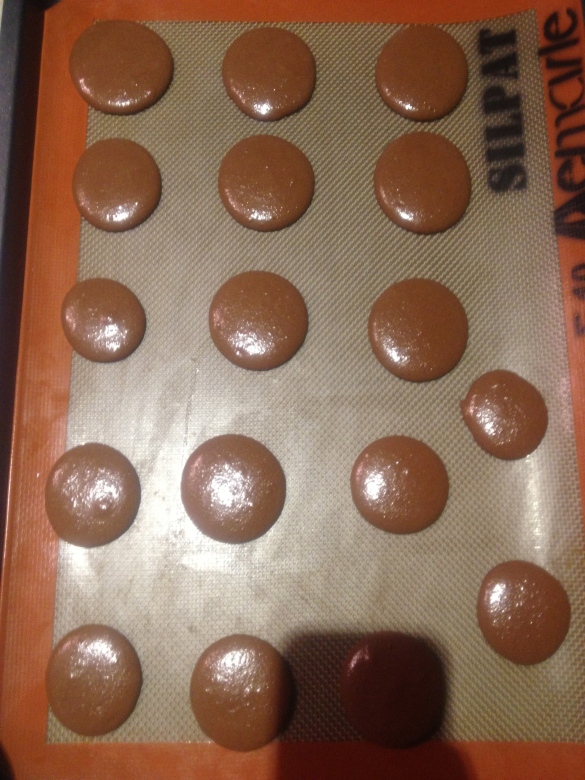
Chocolate Macaron with Nutella Filling

The recipe I used is here and involves using the Italian Meringue method, which essentially boils the sugar in the water until the soft ball stage (around 235 F) The product was extremely chocolaty, but hey, I’m not complaining! However, I do want to give a few pointers to those of you making macarons for your first time!

1) Look for youtube tutorials on how to make. Here is one that I recommend.

2) Gather all your ingredients first, before you start whipping your egg whites or else the fluffiness of the whites will begin to deflate– a bit no no for macarons

3) SIFT YOUR INGREDIENTS! I cannot stress how important this is because you don’t want to end up with chunky bits

4) Let your egg whites age the night before (or even 2 nights before) to reduce the moisture content, allowing the macaron to have a more elastic texture.

5) Follow the directions. This may sound trite, but with macarons, it’s extremely important because every little step will count! Be sure not to over mix or under mix the meringue or else, the macarons will not turn out properly– that is why I suggest looking up youtube tutorials

6) Gently fold your dry ingredients into the whites. Be sure to not to over mix or else you will end up with a runny batter like the one I had with my matcha macarons. The batter should be thick and drip slowly from the spatula.

7) HAVE FUN! Don’t worry if you don’t get it on your first try. Cooking and baking is all about experimenting 🙂

Butter Avenue

Since my trip to Paris in 2011, I’ve fallen in love with macarons. I cant believe I didn’t try them earlier!

In Paris the famous Maison Ladurée was where I had my first macaron. The light and airy crunchy shell along with the sweet and smooth buttercream was just heaven in my mouth.

Now that I’m in Toronto, one of my missions is to find the perfect macaron– and I think I’ve done it!
Ladies and Gentleman, I present to you, Butter Avenue.

Even though they just opened last year, Butter Avenue isn’t far behind some of the other macaron stores in Toronto!

The beautiful and chic white decor makes the store a great place to sit down with some friends and enjoy a nice cup of cappuccino and some sweet delicacies!

Today, I got three flavours: Vie en Rose, Lime & Honey, and Blueberry Cheesecake.

20130714-191757.jpg

The Vie en Rose was great! Although I wish there was a greater rose taste to the macaron, I was extremely pleased with the texture of the macaroon. Crunchy exterior shell, but extremely light on the inside. As well, I’ve had some macaroons in other stores and they were just too sweet! However, i don’t have to worry about that problem with the macarons at Butter Avenue!

After , I tried the lime and honey. I could taste the tartness of the lime and the sweetness of the honey. Another great flavour.

However, my favourite flavour would have to be the blueberry cheesecake. I was very surprised that I even liked it because I’m not a fan of cheesecake. However sandwiched between the sweet macaroon shell was a creamy “cheesecake” buttercream. If that isn’t enough cheesecake goodness for you, there was also a blueberry gelee in the middle of the macaron!

The Blueberry Cheesecake macaron with a "cheesecake" buttercream and blueberry gelee

The Blueberry Cheesecake macaron with a “cheesecake” buttercream and blueberry gelee

For those who enjoy their desserts, I would definitely make a stop on Yonge St. and stop by for some Parisian macarons! You won’t be disappointed!

Why Can’t There be Waffles Every Morning?

In light of the past new rainy and dark days, this morning was actually quite nice! So, in celebration of the sun coming out, I decided to make gluten free and vegan banana walnut waffles– YUM!

These waffles were delicious! Every bite into them had crunch from the walnuts as well as sweet flavour from the bananas. The best part about these waffles was that there was NO sugar added whatsoever.

Gluten Free Vegan Banana Walnut Waffles or Pancakes (whatever you prefer!)

Adapted from My New Roots

– 1/3 cup walnuts

– 2/3 cup rolled oats (I used Bob’s Red Mills Gluten Free Oats)

– 1 tsp cinnamon

– One and a half ripe banana

– 1 tsp. vanilla extract

– 1 tsp. coconut oil (EVOO, Grapeseed, or any other oil is fine)

– 2/3 cup almond milk (or any other non-dairy milk– if you want to make the recipe dairy-free)

– 2 tsp. maple syrup

– Feel free to add any chocolate chips (Be sure to check that they are dairy free if you want to make dairy free waffles/pancakes)

The Ingredients (Although a half of a banana is missing!)

The Ingredients (Although a half of a banana is missing!)


Directions:

Place the walnuts in a high powered blender, such as a Vitamix or Blendtec (or even a food processor) and pulse the walnuts until they resemble a flour-like texture. Remove the walnut flour from the blender, and add in the oats and pulse them until they become a flour. Add both flours together as well as 1 tsp of cinnamon.

In another bowl, mash the banana, and add in the liquid ingredients and mix them.

Banana and Vanilla Extract

Banana and Vanilla Extract

Add the wet ingredients into the dry ingredients, and mix until well combined.

Mixed batter

Mixed batter


Heat a little oil onto a skillet or waffle iron, and add in the waffle/pancake batter. If making pancakes, check to see if the bottom has browned, once it has, then it can be flipped. If making waffles, sit back and relax until the waffle iron is done cooking. I let my waffles sit in the iron for a bit longer because I was afraid of the batter sticking to the iron. So, if you are planning on using a waffle iron, leave it longer, for the waffle to fully cook.

ALMOST perfect waffle

ALMOST perfect waffle

Once the cooking is completed, feel free to add some toppings to it!

ENJOY!

DSC03953

DSC03954

A Hot Summer’s Day…

At 6:00am yesterday morning, I was already up and eating breakfast. Why? you may ask. Well, I was getting ready to head over to Brickworks Farmers Market to volunteer!

My day at Brickworks started from 7:00am and ended at 2:00pm– and boy was it a LONG and HOT day. However, I had tons of fun at Evergreen as I got to learn a  bit more about the area, as well as help out some of the staff in leading activities.

After the day ended, I was almost ready to hot into a tub filled with ice. However, I had a better idea… GELATO. Just up the road on Bayview Avenue was Hollywood Gelato, one of Toronto’s many Gelato shops. I had never been to Hollywood Gelato, so I was extremely excited to try out some of their flavours. I ended up getting a small cup with pistachio and pear, while my mom got pistachio and hazelnut. Ever since going to Paris and trying the gelato at Amorino, my mom and I have been extremely judgemental about other gelato shops because Amorino is THE BEST place for creamy, rich, and flavourful gelato.

My mom wasn’t too crazy about the flavours she ordered as she didn’t think the flavours were truly pronounced. On the other hand, I thought that the pear flavour was something quite unique. The pistachio flavour however, was nothing too special. I was expecting a nuttier flavour, since the pistachio flavour from Amorino had little chucks of pistachio in every bite, but instead got a sweeter taste. This isn’t to say that  Hollywood Gelato is not a good shop, but I prefer gelato to be rich in flavour rather than sugary sweet.

To the right is the cup my mom ordered (Pistachio and Hazelnut), while to the left, is the cup I ordered (Pear and Pistachio)

To the right is the cup my mom ordered (Pistachio and Hazelnut), while to the left, is the cup I ordered (Pear and Pistachio)

Since I had spent the majority of my day in the blazing heat, I decided I should go to another gelato shop– I mean, who can say no to having gelato twice a day. My mom and I headed over to Il Gelatiere. I actually think that Il Gelatiere is one of the best gelato shops I’ve been to in Toronto. Although it is a bit pricer that Hollywood, their flavours are richer and less sweet. I ordered pistachio and hazelnut (you can probably tell that I LOVE pistachio), and I loved its creamy texture. I found the the pistachio taste was much more evident than Hollywood Gelato’s. My only complain would be the portions. I hoped for a greater serving size for the price I paid because the bottom of my cup was hallow. The server who served me placed the gelato on the side of the cup rather than placing it at the bottom, which lead to a gelato-less bottom.

IMG_4646

Pistachio and Hazelnut

Overall, having a total of four scoops of gelato was a fantastic end to my day 🙂 I’m glad that there are so many more hot summery days left for me to enjoy some gelato!

What are some of your favourite gelato flavours? What was the strangest flavour you saw at a gelato or ice cream shop?